


• Title: Model Building & Miniatures – Creating Big Worlds in Small Scale

    If you've ever dreamed of building castles, battlefields, or tiny sci-fi cities, miniature crafting is your gateway to another world. It combines art, architecture, engineering, and storytelling – all in the palm of your hand.

    Here’s how to dive into this satisfying hobby:

    1. Pick your passion.
    Are you drawn to fantasy castles, WW2 tanks, post-apocalyptic dioramas, or tabletop terrain? Knowing your theme helps you choose scale, materials, and tools.


    2. Start small (literally).
    Begin with something manageable like a small building, crate, or landscape tile. Focus on structure, clean edges, and learning how materials behave.


    3. Use accessible materials.
    Foam board, balsa wood, cardboard, air-dry clay, and even old electronics can be transformed into incredible scenes. Don’t underestimate the power of recycled materials.


    4. Master cutting and gluing.
    A sharp hobby knife and quality glue are your best friends. Learn how to make precise cuts and how to use different adhesives for foam, plastic, or wood.


    5. Paint with patience.
    Prime first. Then layer with base colors, shadows, and highlights. Dry brushing and washes are essential techniques for depth and realism.


    6. Add tiny details.
    Texture is key. Use sand, grass tufts, miniature furniture, LED lights, or even printed paper elements. The smallest additions often make the biggest impact.


    7. Plan your diorama.
    If you're building a scene, sketch it out first. Think about composition, storytelling, and perspective. What story does your tiny world tell?


    🎯 Pro Tip: Post your progress on net-twin.de and tag your work! Our creative community thrives on sharing process and inspiration.

    📌 #ModelBuilding #Miniatures #DIYHobby #CreativeProjects #ScaleModels #nettwin


    Kind regards, Andy 🤩

    -----------------------------------
    Advertising that's really worth it for you!

    💰Get it now: Get a €100 voucher from Temu (new customers only)!

    Step 1 - Use my voucher link: https://temu.to/m/uwsjqkbzhhl
    Step 2 - Enter the following code in the search field at Temu to secure your €100!
    The Code: tar37925
    Title: Model Building & Miniatures – Creating Big Worlds in Small Scale If you've ever dreamed of building castles, battlefields, or tiny sci-fi cities, miniature crafting is your gateway to another world. It combines art, architecture, engineering, and storytelling – all in the palm of your hand. Here’s how to dive into this satisfying hobby: 1. Pick your passion. Are you drawn to fantasy castles, WW2 tanks, post-apocalyptic dioramas, or tabletop terrain? Knowing your theme helps you choose scale, materials, and tools. 2. Start small (literally). Begin with something manageable like a small building, crate, or landscape tile. Focus on structure, clean edges, and learning how materials behave. 3. Use accessible materials. Foam board, balsa wood, cardboard, air-dry clay, and even old electronics can be transformed into incredible scenes. Don’t underestimate the power of recycled materials. 4. Master cutting and gluing. A sharp hobby knife and quality glue are your best friends. Learn how to make precise cuts and how to use different adhesives for foam, plastic, or wood. 5. Paint with patience. Prime first. Then layer with base colors, shadows, and highlights. Dry brushing and washes are essential techniques for depth and realism. 6. Add tiny details. Texture is key. Use sand, grass tufts, miniature furniture, LED lights, or even printed paper elements. The smallest additions often make the biggest impact. 7. Plan your diorama. If you're building a scene, sketch it out first. Think about composition, storytelling, and perspective. What story does your tiny world tell? 🎯 Pro Tip: Post your progress on net-twin.de and tag your work! Our creative community thrives on sharing process and inspiration. 📌 #ModelBuilding #Miniatures #DIYHobby #CreativeProjects #ScaleModels #nettwin Kind regards, Andy 🤩 ----------------------------------- Advertising that's really worth it for you! 💰Get it now: Get a €100 voucher from Temu (new customers only)! Step 1 - Use my voucher link: https://temu.to/m/uwsjqkbzhhl Step 2 - Enter the following code in the search field at Temu to secure your €100! The Code: tar37925

    Wow
    2
    0 Commentarios 0 Acciones 13K Views 0 Vista previa
  • Title: Papercraft & Origami – Turning Flat Sheets into 3D Wonders

    Papercraft is the art of turning something fragile and ordinary – paper – into models, masks, sculptures, or even full-blown architectural scenes. Origami, its meditative cousin, thrives on simplicity and elegance. Both train your hands and mind – and offer endless creative paths.


    Let’s explore how to get started with this refined and relaxing hobby:

    1. Choose your paper wisely.
    Not all paper is equal. Use printer paper for basic models, cardstock for strength, and specialty origami paper for fine folding. Experiment with recycled pages, maps, and patterns for texture and flair.


    2. Learn basic folds.
    Valley fold, mountain fold, squash fold – these form the foundation of most models. Origami guides often use standardized symbols; once you learn them, you can follow instructions from any language.


    3. Start with simple forms.
    Begin with boxes, cranes, or cubes. Even building a dice or a lotus flower helps you understand how folds create volume. Don’t rush – precision is key.


    4. Papercraft needs planning.
    Use printable templates (PDFs or SVGs) for more complex 3D builds. Score fold lines with a blunt knife and ruler, then cut cleanly and glue with patience.


    5. Think modular.
    Many larger models are built from repeating pieces. Learn how tabs connect and how to strengthen internal structure subtly using layering techniques.


    6. Get crafty with colors.
    Use watercolor, markers, or printed textures to add flair. A simple white mask becomes haunting with a splash of red or metallic paint.


    7. Storage & display matter.
    Protect your creations from humidity and light. Clear boxes or display domes keep your papercraft safe and visible.


    🎯 Pro Tip: Share your builds and templates on net-twin.de – whether it’s a dragon head or a geometric lamp, our community loves seeing paper come to life.


    📌 #Papercraft #OrigamiArt #PaperDesign #CraftingCommunity #DIYProjects #nettwin


    Kind regards, Andy 😃
    Title: Papercraft & Origami – Turning Flat Sheets into 3D Wonders Papercraft is the art of turning something fragile and ordinary – paper – into models, masks, sculptures, or even full-blown architectural scenes. Origami, its meditative cousin, thrives on simplicity and elegance. Both train your hands and mind – and offer endless creative paths. Let’s explore how to get started with this refined and relaxing hobby: 1. Choose your paper wisely. Not all paper is equal. Use printer paper for basic models, cardstock for strength, and specialty origami paper for fine folding. Experiment with recycled pages, maps, and patterns for texture and flair. 2. Learn basic folds. Valley fold, mountain fold, squash fold – these form the foundation of most models. Origami guides often use standardized symbols; once you learn them, you can follow instructions from any language. 3. Start with simple forms. Begin with boxes, cranes, or cubes. Even building a dice or a lotus flower helps you understand how folds create volume. Don’t rush – precision is key. 4. Papercraft needs planning. Use printable templates (PDFs or SVGs) for more complex 3D builds. Score fold lines with a blunt knife and ruler, then cut cleanly and glue with patience. 5. Think modular. Many larger models are built from repeating pieces. Learn how tabs connect and how to strengthen internal structure subtly using layering techniques. 6. Get crafty with colors. Use watercolor, markers, or printed textures to add flair. A simple white mask becomes haunting with a splash of red or metallic paint. 7. Storage & display matter. Protect your creations from humidity and light. Clear boxes or display domes keep your papercraft safe and visible. 🎯 Pro Tip: Share your builds and templates on net-twin.de – whether it’s a dragon head or a geometric lamp, our community loves seeing paper come to life. 📌 #Papercraft #OrigamiArt #PaperDesign #CraftingCommunity #DIYProjects #nettwin Kind regards, Andy 😃
    Wow
    2
    0 Commentarios 0 Acciones 15K Views 0 Vista previa
  • Title: Graphic Design for Beginners – Make Ideas Look Brilliant

    Graphic design isn’t just decoration – it’s communication. Whether you're designing a poster, logo, website banner or album cover, design helps ideas shine. Getting started is easier than you think – you just need an eye for clarity and a few basic principles.


    Here’s your first creative toolkit:

    1. Understand visual hierarchy.
    Design isn’t just what you show, but how. Use font size, color, spacing, and alignment to guide the viewer’s eye. Big title, medium subhead, small body text – that’s your foundation.


    2. Pick a simple color palette.
    Use no more than 2–3 main colors. Use contrast wisely: dark vs. light, warm vs. cool. Try palette generators like Coolors.co for inspiration.


    3. Fonts matter more than you think.
    Choose readable fonts that match your message. Pair a strong header font (like Bebas Neue or Playfair Display) with a simple body font (like Lato or Roboto). Avoid using more than two fonts per design.


    4. Use grids and alignment.
    Good layout = invisible structure. Align your elements, keep spacing even, and avoid clutter. White space is your friend – it gives your content room to breathe.


    5. Less is (almost) always more.
    Remove anything that doesn’t add value. Ask: Does this element serve a purpose? Clean, minimal designs are more effective than noisy, overloaded ones.


    6. Learn by copying (for now).
    Recreate posters or ads you love just for practice. Don’t publish them, but reverse-engineering is one of the fastest ways to learn what works.


    7. Use free tools to get started.
    Try Canva, Figma, or Photopea. You’ll find templates, stock assets, and easy-to-use interfaces – perfect for learning layout, branding, and content creation.


    🎯 Pro Tip: Share your layouts and WIPs on net-twin.de – other creatives can offer tips on color, type, or flow. Feedback is the secret weapon of every designer.

    📌 #GraphicDesign #BeginnerDesigners #DesignTips #VisualStorytelling #CreativeSkills #nettwin


    Kind regards, Andy 🤩


    -----------------------------------
    Advertising that's really worth it for you!

    💰Get it now: Get a €100 voucher from Temu (new customers only)!

    Step 1 - Use my voucher link: https://temu.to/m/uwsjqkbzhhl
    Step 2 - Enter the following code in the search field at Temu to secure your €100!
    The Code: tar37925

    Title: Graphic Design for Beginners – Make Ideas Look Brilliant Graphic design isn’t just decoration – it’s communication. Whether you're designing a poster, logo, website banner or album cover, design helps ideas shine. Getting started is easier than you think – you just need an eye for clarity and a few basic principles. Here’s your first creative toolkit: 1. Understand visual hierarchy. Design isn’t just what you show, but how. Use font size, color, spacing, and alignment to guide the viewer’s eye. Big title, medium subhead, small body text – that’s your foundation. 2. Pick a simple color palette. Use no more than 2–3 main colors. Use contrast wisely: dark vs. light, warm vs. cool. Try palette generators like Coolors.co for inspiration. 3. Fonts matter more than you think. Choose readable fonts that match your message. Pair a strong header font (like Bebas Neue or Playfair Display) with a simple body font (like Lato or Roboto). Avoid using more than two fonts per design. 4. Use grids and alignment. Good layout = invisible structure. Align your elements, keep spacing even, and avoid clutter. White space is your friend – it gives your content room to breathe. 5. Less is (almost) always more. Remove anything that doesn’t add value. Ask: Does this element serve a purpose? Clean, minimal designs are more effective than noisy, overloaded ones. 6. Learn by copying (for now). Recreate posters or ads you love just for practice. Don’t publish them, but reverse-engineering is one of the fastest ways to learn what works. 7. Use free tools to get started. Try Canva, Figma, or Photopea. You’ll find templates, stock assets, and easy-to-use interfaces – perfect for learning layout, branding, and content creation. 🎯 Pro Tip: Share your layouts and WIPs on net-twin.de – other creatives can offer tips on color, type, or flow. Feedback is the secret weapon of every designer. 📌 #GraphicDesign #BeginnerDesigners #DesignTips #VisualStorytelling #CreativeSkills #nettwin Kind regards, Andy 🤩 ----------------------------------- Advertising that's really worth it for you! 💰Get it now: Get a €100 voucher from Temu (new customers only)! Step 1 - Use my voucher link: https://temu.to/m/uwsjqkbzhhl Step 2 - Enter the following code in the search field at Temu to secure your €100! The Code: tar37925
    Like
    Wow
    2
    0 Commentarios 0 Acciones 21K Views 0 Vista previa
  • Our top 10 visitor nations today are:
    Our top 10 visitor nations today are:
    Wow
    3
    0 Commentarios 0 Acciones 6K Views 0 Vista previa
  • Are you a fan of games like #Fallout, #Metro, #Wasteland or #Stalker - then maybe this HTML theme is for you. You can get it here: https://ko-fi.com/s/5d8ce2b3da

    -----------------------------------
    Advertising that's really worth it for you!

    💰Get it now: Get a €100 voucher from Temu (new customers only)!

    Step 1 - Use my voucher link: https://temu.to/m/uwsjqkbzhhl
    Step 2 - Enter the following code in the search field at Temu to secure your €100!
    The Code: tar37925
    Are you a fan of games like #Fallout, #Metro, #Wasteland or #Stalker - then maybe this HTML theme is for you. You can get it here: https://ko-fi.com/s/5d8ce2b3da ----------------------------------- Advertising that's really worth it for you! 💰Get it now: Get a €100 voucher from Temu (new customers only)! Step 1 - Use my voucher link: https://temu.to/m/uwsjqkbzhhl Step 2 - Enter the following code in the search field at Temu to secure your €100! The Code: tar37925

    Wow
    2
    0 Commentarios 0 Acciones 13K Views 0 Vista previa
  • Title: Leathercraft for Beginners – How to Work with One of Humanity’s Oldest Materials

    Leathercraft connects us with millennia of tradition – from ancient armor and saddles to wallets, sheaths, and belts. With just a few tools and some patience, you can shape, stamp, and dye leather into something uniquely yours.


    Here’s how to get started:

    1. Choose the right leather.
    Start with vegetable-tanned leather – it’s firm, cuts cleanly, and takes tooling and dye beautifully. Thickness is measured in ounces: 4–5 oz is great for wallets, 7–9 oz for sheaths or belts.


    2. Basic tools to begin with:

    - Sharp utility knife or rotary cutter

    - Swivel knife (for carving)

    - Edge beveler

    - Mallet and stamping tools

    - Burnisher (wood or bone)

    - Hole punch

    - Ruler and scratch awl

    You don’t need a full workshop – just a good workspace and solid lighting.


    3. Cutting and patterning.
    Always trace your pattern on the flesh side with a scratch awl. Cut slowly with firm pressure. Use grid mats for accuracy and safety.


    4. Tooling and stamping.
    Dampen the leather with a sponge before carving. Use your swivel knife to outline designs, then stamp textures or patterns with specialized tools and a mallet. Practice on scraps first!


    5. Edge finishing makes the difference.
    Bevel the edge, wet slightly, and rub vigorously with a burnisher using gum tragacanth, beeswax, or saddle soap. A smooth edge feels pro.


    6. Dyeing & sealing.
    Use water-based or alcohol dyes in multiple thin layers. Always test first. Seal with acrylic finish or natural oils for a lasting surface.


    7. Stitching like a pro.
    Use two needles and waxed thread for a classic saddle stitch. Punch holes with a pricking iron or awl – keep spacing even. Don’t rush. Clean stitching makes the piece.


    🎯 Pro Tip: Share your leatherwork on net-twin.de – from hand-tooled belts to engraved sheaths. Our community values real craftsmanship and detail.

    📌 #Leathercraft #ToolingLeather #HandmadeGear #CreativeHands #Craftsmanship #nettwin


    Kind regards, Andy 😆


    -----------------------------------
    Advertising that's really worth it for you!

    Get it now: Get a €100 voucher from Temu (new customers only)!

    Step 1 - Use my voucher link: https://temu.to/m/uwsjqkbzhhl
    Step 2 - Enter the following code in the search field at Temu to secure your €100!
    The Code: tar37925

    Title: Leathercraft for Beginners – How to Work with One of Humanity’s Oldest Materials Leathercraft connects us with millennia of tradition – from ancient armor and saddles to wallets, sheaths, and belts. With just a few tools and some patience, you can shape, stamp, and dye leather into something uniquely yours. Here’s how to get started: 1. Choose the right leather. Start with vegetable-tanned leather – it’s firm, cuts cleanly, and takes tooling and dye beautifully. Thickness is measured in ounces: 4–5 oz is great for wallets, 7–9 oz for sheaths or belts. 2. Basic tools to begin with: - Sharp utility knife or rotary cutter - Swivel knife (for carving) - Edge beveler - Mallet and stamping tools - Burnisher (wood or bone) - Hole punch - Ruler and scratch awl You don’t need a full workshop – just a good workspace and solid lighting. 3. Cutting and patterning. Always trace your pattern on the flesh side with a scratch awl. Cut slowly with firm pressure. Use grid mats for accuracy and safety. 4. Tooling and stamping. Dampen the leather with a sponge before carving. Use your swivel knife to outline designs, then stamp textures or patterns with specialized tools and a mallet. Practice on scraps first! 5. Edge finishing makes the difference. Bevel the edge, wet slightly, and rub vigorously with a burnisher using gum tragacanth, beeswax, or saddle soap. A smooth edge feels pro. 6. Dyeing & sealing. Use water-based or alcohol dyes in multiple thin layers. Always test first. Seal with acrylic finish or natural oils for a lasting surface. 7. Stitching like a pro. Use two needles and waxed thread for a classic saddle stitch. Punch holes with a pricking iron or awl – keep spacing even. Don’t rush. Clean stitching makes the piece. 🎯 Pro Tip: Share your leatherwork on net-twin.de – from hand-tooled belts to engraved sheaths. Our community values real craftsmanship and detail. 📌 #Leathercraft #ToolingLeather #HandmadeGear #CreativeHands #Craftsmanship #nettwin Kind regards, Andy 😆 ----------------------------------- Advertising that's really worth it for you! Get it now: Get a €100 voucher from Temu (new customers only)! Step 1 - Use my voucher link: https://temu.to/m/uwsjqkbzhhl Step 2 - Enter the following code in the search field at Temu to secure your €100! The Code: tar37925

    Like
    Wow
    2
    0 Commentarios 0 Acciones 18K Views 0 Vista previa
  • Like
    1
    0 Commentarios 0 Acciones 795 Views 0 Vista previa
  • Love
    1
    0 Commentarios 0 Acciones 837 Views 0 Vista previa
  • 0 Commentarios 0 Acciones 836 Views 0 Vista previa
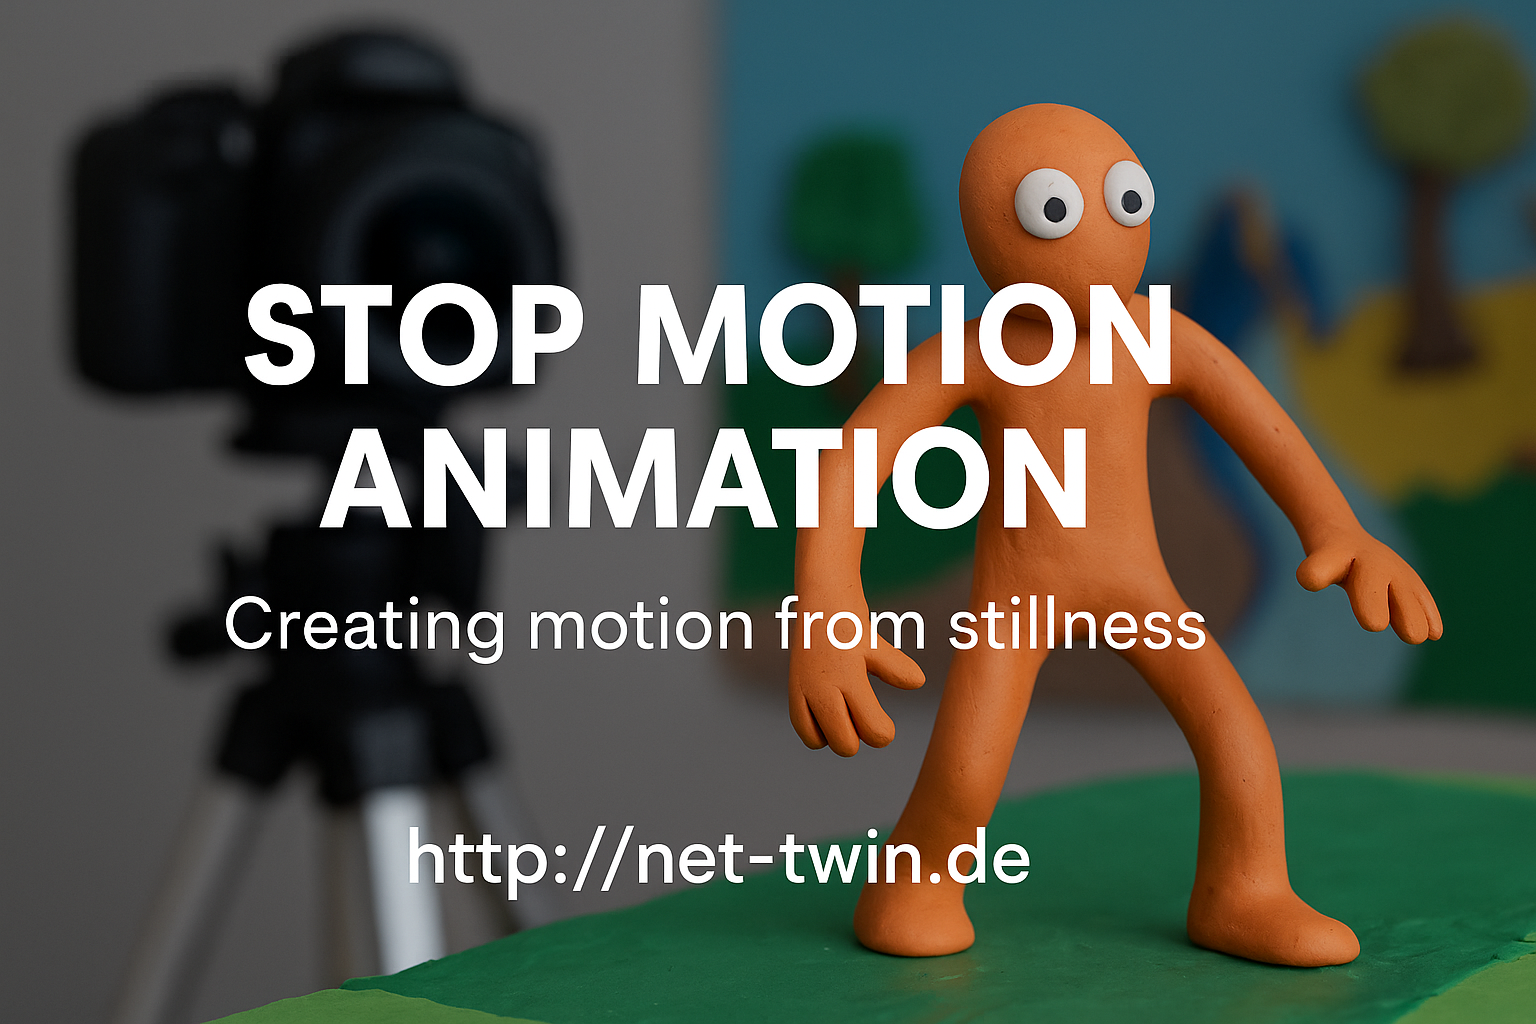
  • Title: Stop Motion Animation – Creating Motion from Stillness


    Stop motion is one of the oldest and most magical forms of animation. It’s not about speed – it’s about rhythm, planning, and breathing life into the inanimate. Whether you animate clay figures, paper cutouts, or even kitchen utensils, this hobby is both playful and powerful.

    Here’s how to get started:

    1. Understand what stop motion is.
    It’s a series of photos where each frame shows a tiny movement. Played back at 12–24 frames per second, it creates the illusion of life.

    2. Pick your medium.
    Popular choices include:

    Clay (claymation)

    Paper (cutout animation)

    Lego or figures (brickfilms)

    Everyday objects (pixilation or object animation)

    Each has its own charm. Try what you already have at home!

    3. Keep it steady.
    Use a tripod or solid surface. Shaky shots ruin the illusion. Tape your setup down if needed. For phone cameras, try simple tripods or holders.

    4. Use a stop motion app or software.
    For mobile: Stop Motion Studio is great.
    On desktop: Dragonframe (pro), or free options like MonkeyJam or Kdenlive for frame editing.

    5. Light is everything.
    Use constant light sources. Avoid windows or sunlight – shadows change quickly. Desk lamps or LED panels work best.

    6. Plan your movement.
    Sketch a basic storyboard. Think in “key poses” first, then fill in transitions. More frames = smoother motion, but also more effort.

    7. Add sound & effects later.
    Record audio separately or use royalty-free sounds. Add effects (dust, shake, filters) in post-editing to enhance the mood.

    🎯 Pro Tip: Even a bouncing ball is a great starting exercise. Share your short clips and behind-the-scenes shots on net-twin.de – people love seeing the magic before it’s polished!

    📌 #StopMotion #FrameByFrame #DIYAnimation #CreativeProcess #AnimationMagic #nettwin


    Kind regards, Andy 🤩

    -----------------------------------
    Advertising that's really worth it for you!

    💰 Get it now: Get a €100 voucher from Temu (new customers only)!

    Step 1 - Use my voucher link: https://temu.to/m/uwsjqkbzhhl
    Step 2 - Enter the following code in the search field at Temu to secure your €100!
    The Code: tar37925

    Title: Stop Motion Animation – Creating Motion from Stillness Stop motion is one of the oldest and most magical forms of animation. It’s not about speed – it’s about rhythm, planning, and breathing life into the inanimate. Whether you animate clay figures, paper cutouts, or even kitchen utensils, this hobby is both playful and powerful. Here’s how to get started: 1. Understand what stop motion is. It’s a series of photos where each frame shows a tiny movement. Played back at 12–24 frames per second, it creates the illusion of life. 2. Pick your medium. Popular choices include: Clay (claymation) Paper (cutout animation) Lego or figures (brickfilms) Everyday objects (pixilation or object animation) Each has its own charm. Try what you already have at home! 3. Keep it steady. Use a tripod or solid surface. Shaky shots ruin the illusion. Tape your setup down if needed. For phone cameras, try simple tripods or holders. 4. Use a stop motion app or software. For mobile: Stop Motion Studio is great. On desktop: Dragonframe (pro), or free options like MonkeyJam or Kdenlive for frame editing. 5. Light is everything. Use constant light sources. Avoid windows or sunlight – shadows change quickly. Desk lamps or LED panels work best. 6. Plan your movement. Sketch a basic storyboard. Think in “key poses” first, then fill in transitions. More frames = smoother motion, but also more effort. 7. Add sound & effects later. Record audio separately or use royalty-free sounds. Add effects (dust, shake, filters) in post-editing to enhance the mood. 🎯 Pro Tip: Even a bouncing ball is a great starting exercise. Share your short clips and behind-the-scenes shots on net-twin.de – people love seeing the magic before it’s polished! 📌 #StopMotion #FrameByFrame #DIYAnimation #CreativeProcess #AnimationMagic #nettwin Kind regards, Andy 🤩 ----------------------------------- Advertising that's really worth it for you! 💰 Get it now: Get a €100 voucher from Temu (new customers only)! Step 1 - Use my voucher link: https://temu.to/m/uwsjqkbzhhl Step 2 - Enter the following code in the search field at Temu to secure your €100! The Code: tar37925
    Wow
    2
    0 Commentarios 0 Acciones 18K Views 0 Vista previa