

No Advertising!
ATTENTION - anyone who registers an account here just to advertise their own business for free, don't even bother, all these accounts will be deleted immediately!!!
Attention: The first three posts from each user will be submitted to the moderators for review and only then approved. This allows us to immediately filter out spam accounts and provide you, our users, with a pleasant community experience as good as free from annoying spam.
We are a community for creative people and their hobbies, if you just want to post ads you are wrong here. We want to spare our users your intrusive advertising, unless you combine it with valuable content (tutorials, project reports, portfolios etc.).
Thank you for your attention.
The Net-Twin Team

-
Many of our visitors also come from countries like Pakistan, India, Singapore, and China, and I would like to sincerely thank you for your interest. Don't be shy and feel free to use our wonderful platform for creative content; tell us about your hobbies.
- आपकी दिलचस्पी और नेट-ट्विन पर आने के लिए धन्यवाद।
- Terima kasih atas minat anda dan kerana melawat Net-Twin.
- آپ کی دلچسپی اور Net-Twin میں آنے کے لیے آپ کا شکریہ۔
- 感谢您对Net-Twin的关注和访问。
Kind regards, Andreas and TeamMany of our visitors also come from countries like Pakistan, India, Singapore, and China, and I would like to sincerely thank you for your interest. Don't be shy and feel free to use our wonderful platform for creative content; tell us about your hobbies. - आपकी दिलचस्पी और नेट-ट्विन पर आने के लिए धन्यवाद। - Terima kasih atas minat anda dan kerana melawat Net-Twin. - آپ کی دلچسپی اور Net-Twin میں آنے کے لیے آپ کا شکریہ۔ - 感谢您对Net-Twin的关注和访问。 Kind regards, Andreas and Team 🤩0 Comments 0 Shares 96 Views 0 Reviews1
-
Another year is coming to an end — a year filled with #ideas, conversations, #creativity, and honest exchange. For that, I want to say thank you from the bottom of my heart.
#Net-Twin doesn’t live from technology or features alone, but from people who stay, think along, contribute, and sometimes simply take the time to read. In times like these, that kind of loyalty is anything but taken for granted.
I wish you calm, warm #Christmas days. Time to breathe. Time for family, friends, or simply for yourself. May the coming year bring you health, clarity, and just enough curiosity to keep walking your own path — here on Net-Twin and beyond.
Thank you for being part of this community.
Merry Christmas and a peaceful transition into the new year.
Kind regards, AndreasAnother year is coming to an end — a year filled with #ideas, conversations, #creativity, and honest exchange. For that, I want to say thank you from the bottom of my heart. #Net-Twin doesn’t live from technology or features alone, but from people who stay, think along, contribute, and sometimes simply take the time to read. In times like these, that kind of loyalty is anything but taken for granted. I wish you calm, warm #Christmas days. Time to breathe. Time for family, friends, or simply for yourself. May the coming year bring you health, clarity, and just enough curiosity to keep walking your own path — here on Net-Twin and beyond. Thank you for being part of this community. Merry Christmas and a peaceful transition into the new year. 🥳 Kind regards, Andreas 🤩 0 Comments 0 Shares 829 Views 0 Reviews1
-
Here's one of our #FragmentaVox wallpapers. Our album "FRAGMENTA VOX – Nine Fragments of a Silent World", which you can buy on Bandcamp https://fragmentavox.bandcamp.com/album/fragmenta-vox-nine-fragments-of-a-silent-world also includes a complete art flipbook and other goodies.
Enjoy, and thanks for your support!
Best regards, AndreasHere's one of our #FragmentaVox wallpapers. Our album "FRAGMENTA VOX – Nine Fragments of a Silent World", which you can buy on Bandcamp https://fragmentavox.bandcamp.com/album/fragmenta-vox-nine-fragments-of-a-silent-world also includes a complete art flipbook and other goodies. Enjoy, and thanks for your support! Best regards, Andreas 0 Comments 0 Shares 2K Views 0 Reviews1
-
## Simple Diffusion Paper Challenge: Color Spread Experiment
**TL;DR:** Explore how color spreads through paper by observing simple diffusion using water and food coloring.
- Place a drop of food coloring on a dry paper towel and add a drop of water next to it.
- Watch how the color moves and spreads over time without any external force.
- Compare how different types of paper affect the speed and pattern of diffusion.
*Pro Tip:* Use a timer and take photos at regular intervals to track the diffusion progress accurately.
What patterns do you notice when changing the type of paper or amount of water?
#simplediffusion #sciencechallenge #paperscience #colorexperiment #learningthroughplay #stemforkids## Simple Diffusion Paper Challenge: Color Spread Experiment **TL;DR:** Explore how color spreads through paper by observing simple diffusion using water and food coloring. - Place a drop of food coloring on a dry paper towel and add a drop of water next to it. - Watch how the color moves and spreads over time without any external force. - Compare how different types of paper affect the speed and pattern of diffusion. *Pro Tip:* Use a timer and take photos at regular intervals to track the diffusion progress accurately. What patterns do you notice when changing the type of paper or amount of water? #simplediffusion #sciencechallenge #paperscience #colorexperiment #learningthroughplay #stemforkids0 Comments 0 Shares 3K Views 0 Reviews2
-
## Mastering Depth of Field for Stunning DIY Phone Product Shots
**TL;DR: Create professional-looking product photos by controlling depth of field using your phone’s portrait mode, distance, and lighting.**
Depth of field (DoF) refers to the area of your photo that appears sharp. In product photography, a shallow DoF helps isolate the item by blurring the background, making your product pop even when shooting with a phone. Use your phone’s portrait mode or adjust the distance between the product and background to control this effect. Good lighting also enhances clarity and depth perception.
- Use portrait mode or aperture control if available
- Position your product several feet from the background
- Keep your phone closer to the product for a shallower DoF
- Use natural or soft artificial lighting to avoid harsh shadows
- Experiment with angles to emphasize product details
What’s your biggest challenge when trying to create blurred backgrounds with your phone?
#phonephotography #productshots #depthoffield #diyphotography #mobilephotography## Mastering Depth of Field for Stunning DIY Phone Product Shots **TL;DR: Create professional-looking product photos by controlling depth of field using your phone’s portrait mode, distance, and lighting.** Depth of field (DoF) refers to the area of your photo that appears sharp. In product photography, a shallow DoF helps isolate the item by blurring the background, making your product pop even when shooting with a phone. Use your phone’s portrait mode or adjust the distance between the product and background to control this effect. Good lighting also enhances clarity and depth perception. - Use portrait mode or aperture control if available - Position your product several feet from the background - Keep your phone closer to the product for a shallower DoF - Use natural or soft artificial lighting to avoid harsh shadows - Experiment with angles to emphasize product details What’s your biggest challenge when trying to create blurred backgrounds with your phone? #phonephotography #productshots #depthoffield #diyphotography #mobilephotography0 Comments 0 Shares 3K Views 0 Reviews2
-
## How to Master Low-Light Photography Indoors
**TL;DR:** Use a wide aperture, slow shutter speed, and higher ISO to capture clear indoor photos in low light without a flash.
- open your lens aperture wide (f/1.8–f/2.8) to let in more light
- lower shutter speed (1/30s or slower) but use a tripod or steady surface to avoid blur
- increase ISO gradually (start around 800) to brighten the image without excessive noise
- utilize available light sources creatively (lamps, candles) for mood and depth
- shoot in RAW format for better post-processing flexibility
*Pro Tip:* Use manual focus or focus peaking to ensure sharpness when autofocus struggles in dim conditions.
What’s your favorite subject to capture in low light indoors?
#lowlightphotography #indoorphotography #photographytips #nightphotography #dslr #creativephotography## How to Master Low-Light Photography Indoors **TL;DR:** Use a wide aperture, slow shutter speed, and higher ISO to capture clear indoor photos in low light without a flash. - open your lens aperture wide (f/1.8–f/2.8) to let in more light - lower shutter speed (1/30s or slower) but use a tripod or steady surface to avoid blur - increase ISO gradually (start around 800) to brighten the image without excessive noise - utilize available light sources creatively (lamps, candles) for mood and depth - shoot in RAW format for better post-processing flexibility *Pro Tip:* Use manual focus or focus peaking to ensure sharpness when autofocus struggles in dim conditions. What’s your favorite subject to capture in low light indoors? #lowlightphotography #indoorphotography #photographytips #nightphotography #dslr #creativephotography0 Comments 0 Shares 3K Views 0 Reviews 2
2
-
Title: Macro & Micro Photography – Discovering the Beauty of Small Things
There’s an entire universe just below the threshold of the naked eye – textures, patterns, creatures, and structures most people overlook. Macro and micro photography bring this world into focus, one detail at a time.
Here’s how you can start exploring it with your lens:
1. Know the difference.
Macro photography deals with small subjects at close range – like insects, textures, or plants – usually at a 1:1 magnification or higher.
Micro photography (or photomicrography) involves microscopes to photograph what’s otherwise invisible – like crystals, cells, or microfibers.
2. Start with what you have.
Many smartphones today offer decent macro modes. Clip-on macro lenses are inexpensive and can produce surprising results. For DSLRs or mirrorless cameras, a dedicated macro lens (like a 100mm f/2.8) is ideal.
3. Stabilization is key.
At this scale, even the tiniest movement ruins the shot. Use a tripod, remote shutter, and delay timer. For extreme close-ups, consider a focusing rail for precision.
4. Light your subject well.
Natural light can work, but artificial light gives you control. Use LED rings, soft diffused light, or even a flashlight with a diffuser. Avoid harsh shadows and reflections.
5. Mind your depth of field.
At macro scale, depth of field is razor thin. Shoot at f/8–f/16, and use focus stacking (multiple shots with different focus points) to get your entire subject sharp.
6. Subject ideas to start with:
Textures: leaves, fabrics, wood grain
Water droplets
Bugs and insects (if they stay still!)
Everyday objects like salt, match heads, coins
Crystals, sand, spices, feathers
7. Edit with care.
Sharpening, contrast, and color adjustments can enhance details – but don’t overdo it. Highlight the natural beauty of the micro world.
Pro Tip: Upload your discoveries to net-twin.de
– whether it’s a bug’s eye or a dew-covered thread, your lens reveals what others miss.
#MacroPhotography #MicroWorlds #CloseUpMagic #CreativeVision #TinyDetails #nettwin
Kind regards, Andy
-----------------------------------
Advertising that's really worth it for you!
Get it now: Get a €100 voucher from Temu (new customers only)!
Step 1 - Use my voucher link: https://temu.to/m/uwsjqkbzhhl
Step 2 - Enter the following code in the search field at Temu to secure your €100!
The Code: tar37925
Title: Macro & Micro Photography – Discovering the Beauty of Small Things There’s an entire universe just below the threshold of the naked eye – textures, patterns, creatures, and structures most people overlook. Macro and micro photography bring this world into focus, one detail at a time. Here’s how you can start exploring it with your lens: 1. Know the difference. Macro photography deals with small subjects at close range – like insects, textures, or plants – usually at a 1:1 magnification or higher. Micro photography (or photomicrography) involves microscopes to photograph what’s otherwise invisible – like crystals, cells, or microfibers. 2. Start with what you have. Many smartphones today offer decent macro modes. Clip-on macro lenses are inexpensive and can produce surprising results. For DSLRs or mirrorless cameras, a dedicated macro lens (like a 100mm f/2.8) is ideal. 3. Stabilization is key. At this scale, even the tiniest movement ruins the shot. Use a tripod, remote shutter, and delay timer. For extreme close-ups, consider a focusing rail for precision. 4. Light your subject well. Natural light can work, but artificial light gives you control. Use LED rings, soft diffused light, or even a flashlight with a diffuser. Avoid harsh shadows and reflections. 5. Mind your depth of field. At macro scale, depth of field is razor thin. Shoot at f/8–f/16, and use focus stacking (multiple shots with different focus points) to get your entire subject sharp. 6. Subject ideas to start with: Textures: leaves, fabrics, wood grain Water droplets Bugs and insects (if they stay still!) Everyday objects like salt, match heads, coins Crystals, sand, spices, feathers 7. Edit with care. Sharpening, contrast, and color adjustments can enhance details – but don’t overdo it. Highlight the natural beauty of the micro world. 🎯 Pro Tip: Upload your discoveries to net-twin.de – whether it’s a bug’s eye or a dew-covered thread, your lens reveals what others miss. 📌 #MacroPhotography #MicroWorlds #CloseUpMagic #CreativeVision #TinyDetails #nettwin Kind regards, Andy 🤩 ----------------------------------- Advertising that's really worth it for you! Get it now: Get a €100 voucher from Temu (new customers only)! Step 1 - Use my voucher link: https://temu.to/m/uwsjqkbzhhl Step 2 - Enter the following code in the search field at Temu to secure your €100! The Code: tar37925 0 Comments 0 Shares 5K Views 0 Reviews1
-
Title: Calligraphy & Hand Lettering – Drawing Letters with Personality
Calligraphy isn’t just writing – it’s the art of giving letters rhythm, weight, and soul. Whether you're aiming for classic copperplate scripts or playful modern lettering, this hobby combines fine motor skills with expressive design.
Let’s dive into how you can get started with calligraphy and hand lettering:
1. Know the difference.
Calligraphy is about writing – you use tools like nib pens or brushes to form letters in real time, with variation in pressure and stroke.
Hand lettering is about drawing letters – each shape is crafted like an illustration.
Both are deeply artistic and often overlap in style and technique.
2. Start with basic tools.
For beginners:
Calligraphy: a dip pen + nib + ink (or brush pens for ease)
Hand lettering: pencils, fineliners, and brush pens (Tombow, Fudenosuke, etc.)
Smooth paper that won’t bleed or feather
Digital tools like the Apple Pencil + Procreate are also great alternatives.
3. Learn the strokes, not just the alphabet.
Practice basic strokes: upstrokes (light), downstrokes (heavy), loops, ovals. Master these before you form letters – they’re the building blocks of every script.
4. Focus on spacing and balance.
Beautiful lettering is more about consistency than perfection. Watch for even spacing, similar angles, and good rhythm between letters.
5. Use guidelines.
Draw pencil guides for baseline, x-height, ascenders, and descenders. It’s not cheating – it’s essential.
6. Don’t rush.
Speed kills style. Take your time. Breath, write slowly, and enjoy the flow. Good calligraphy feels meditative.
7. Explore different styles.
Try gothic blackletter, italic, Roman capitals, modern script… or create your own. Mixing styles can add personality to your projects.
Pro Tip: Post your progress and practice sheets on net-twin.de
– our creative community loves beautiful lines, mindful craft, and expressive inkwork.
#Calligraphy #HandLettering #ModernScript #CreativeWriting #InkArt #nettwin
Kind regards, Andy
-----------------------------------
Advertising that's really worth it for you!
Get it now: Get a €100 voucher from Temu (new customers only)!
Step 1 - Use my voucher link: https://temu.to/m/uwsjqkbzhhl
Step 2 - Enter the following code in the search field at Temu to secure your €100!
The Code: tar37925Title: Calligraphy & Hand Lettering – Drawing Letters with Personality Calligraphy isn’t just writing – it’s the art of giving letters rhythm, weight, and soul. Whether you're aiming for classic copperplate scripts or playful modern lettering, this hobby combines fine motor skills with expressive design. Let’s dive into how you can get started with calligraphy and hand lettering: 1. Know the difference. Calligraphy is about writing – you use tools like nib pens or brushes to form letters in real time, with variation in pressure and stroke. Hand lettering is about drawing letters – each shape is crafted like an illustration. Both are deeply artistic and often overlap in style and technique. 2. Start with basic tools. For beginners: Calligraphy: a dip pen + nib + ink (or brush pens for ease) Hand lettering: pencils, fineliners, and brush pens (Tombow, Fudenosuke, etc.) Smooth paper that won’t bleed or feather Digital tools like the Apple Pencil + Procreate are also great alternatives. 3. Learn the strokes, not just the alphabet. Practice basic strokes: upstrokes (light), downstrokes (heavy), loops, ovals. Master these before you form letters – they’re the building blocks of every script. 4. Focus on spacing and balance. Beautiful lettering is more about consistency than perfection. Watch for even spacing, similar angles, and good rhythm between letters. 5. Use guidelines. Draw pencil guides for baseline, x-height, ascenders, and descenders. It’s not cheating – it’s essential. 6. Don’t rush. Speed kills style. Take your time. Breath, write slowly, and enjoy the flow. Good calligraphy feels meditative. 7. Explore different styles. Try gothic blackletter, italic, Roman capitals, modern script… or create your own. Mixing styles can add personality to your projects. 🎯 Pro Tip: Post your progress and practice sheets on net-twin.de – our creative community loves beautiful lines, mindful craft, and expressive inkwork. 📌 #Calligraphy #HandLettering #ModernScript #CreativeWriting #InkArt #nettwin Kind regards, Andy 🤩 ----------------------------------- Advertising that's really worth it for you! Get it now: Get a €100 voucher from Temu (new customers only)! Step 1 - Use my voucher link: https://temu.to/m/uwsjqkbzhhl Step 2 - Enter the following code in the search field at Temu to secure your €100! The Code: tar37925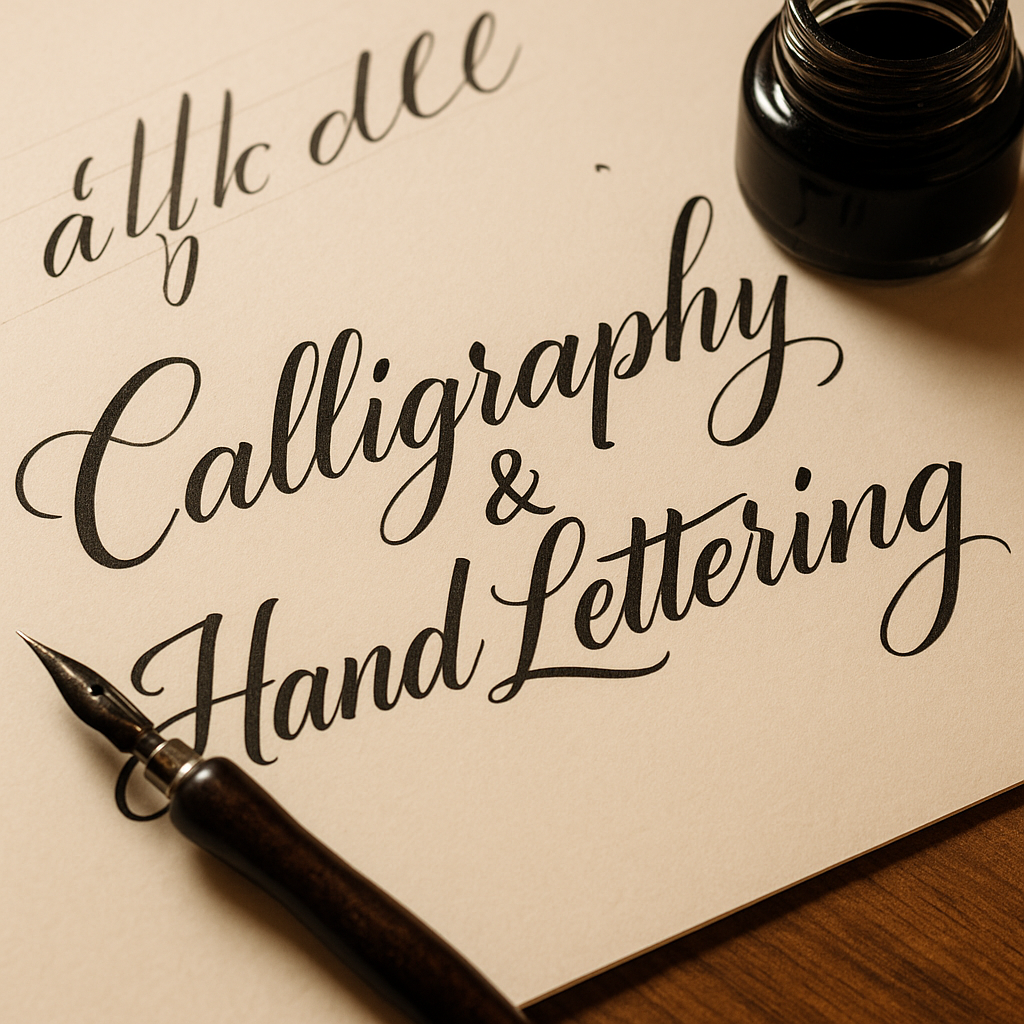 0 Comments 0 Shares 7K Views 0 Reviews2
-
Title: Stop Motion Animation – Creating Motion from Stillness
Stop motion is one of the oldest and most magical forms of animation. It’s not about speed – it’s about rhythm, planning, and breathing life into the inanimate. Whether you animate clay figures, paper cutouts, or even kitchen utensils, this hobby is both playful and powerful.
Here’s how to get started:
1. Understand what stop motion is.
It’s a series of photos where each frame shows a tiny movement. Played back at 12–24 frames per second, it creates the illusion of life.
2. Pick your medium.
Popular choices include:
Clay (claymation)
Paper (cutout animation)
Lego or figures (brickfilms)
Everyday objects (pixilation or object animation)
Each has its own charm. Try what you already have at home!
3. Keep it steady.
Use a tripod or solid surface. Shaky shots ruin the illusion. Tape your setup down if needed. For phone cameras, try simple tripods or holders.
4. Use a stop motion app or software.
For mobile: Stop Motion Studio is great.
On desktop: Dragonframe (pro), or free options like MonkeyJam or Kdenlive for frame editing.
5. Light is everything.
Use constant light sources. Avoid windows or sunlight – shadows change quickly. Desk lamps or LED panels work best.
6. Plan your movement.
Sketch a basic storyboard. Think in “key poses” first, then fill in transitions. More frames = smoother motion, but also more effort.
7. Add sound & effects later.
Record audio separately or use royalty-free sounds. Add effects (dust, shake, filters) in post-editing to enhance the mood.
Pro Tip: Even a bouncing ball is a great starting exercise. Share your short clips and behind-the-scenes shots on net-twin.de – people love seeing the magic before it’s polished!
#StopMotion #FrameByFrame #DIYAnimation #CreativeProcess #AnimationMagic #nettwin
Kind regards, Andy
-----------------------------------
Advertising that's really worth it for you!
Get it now: Get a €100 voucher from Temu (new customers only)!
Step 1 - Use my voucher link: https://temu.to/m/uwsjqkbzhhl
Step 2 - Enter the following code in the search field at Temu to secure your €100!
The Code: tar37925
Title: Stop Motion Animation – Creating Motion from Stillness Stop motion is one of the oldest and most magical forms of animation. It’s not about speed – it’s about rhythm, planning, and breathing life into the inanimate. Whether you animate clay figures, paper cutouts, or even kitchen utensils, this hobby is both playful and powerful. Here’s how to get started: 1. Understand what stop motion is. It’s a series of photos where each frame shows a tiny movement. Played back at 12–24 frames per second, it creates the illusion of life. 2. Pick your medium. Popular choices include: Clay (claymation) Paper (cutout animation) Lego or figures (brickfilms) Everyday objects (pixilation or object animation) Each has its own charm. Try what you already have at home! 3. Keep it steady. Use a tripod or solid surface. Shaky shots ruin the illusion. Tape your setup down if needed. For phone cameras, try simple tripods or holders. 4. Use a stop motion app or software. For mobile: Stop Motion Studio is great. On desktop: Dragonframe (pro), or free options like MonkeyJam or Kdenlive for frame editing. 5. Light is everything. Use constant light sources. Avoid windows or sunlight – shadows change quickly. Desk lamps or LED panels work best. 6. Plan your movement. Sketch a basic storyboard. Think in “key poses” first, then fill in transitions. More frames = smoother motion, but also more effort. 7. Add sound & effects later. Record audio separately or use royalty-free sounds. Add effects (dust, shake, filters) in post-editing to enhance the mood. 🎯 Pro Tip: Even a bouncing ball is a great starting exercise. Share your short clips and behind-the-scenes shots on net-twin.de – people love seeing the magic before it’s polished! 📌 #StopMotion #FrameByFrame #DIYAnimation #CreativeProcess #AnimationMagic #nettwin Kind regards, Andy 🤩 ----------------------------------- Advertising that's really worth it for you! 💰 Get it now: Get a €100 voucher from Temu (new customers only)! Step 1 - Use my voucher link: https://temu.to/m/uwsjqkbzhhl Step 2 - Enter the following code in the search field at Temu to secure your €100! The Code: tar37925 0 Comments 0 Shares 7K Views 0 Reviews2
-
Title: Leathercraft for Beginners – How to Work with One of Humanity’s Oldest Materials
Leathercraft connects us with millennia of tradition – from ancient armor and saddles to wallets, sheaths, and belts. With just a few tools and some patience, you can shape, stamp, and dye leather into something uniquely yours.
Here’s how to get started:
1. Choose the right leather.
Start with vegetable-tanned leather – it’s firm, cuts cleanly, and takes tooling and dye beautifully. Thickness is measured in ounces: 4–5 oz is great for wallets, 7–9 oz for sheaths or belts.
2. Basic tools to begin with:
- Sharp utility knife or rotary cutter
- Swivel knife (for carving)
- Edge beveler
- Mallet and stamping tools
- Burnisher (wood or bone)
- Hole punch
- Ruler and scratch awl
You don’t need a full workshop – just a good workspace and solid lighting.
3. Cutting and patterning.
Always trace your pattern on the flesh side with a scratch awl. Cut slowly with firm pressure. Use grid mats for accuracy and safety.
4. Tooling and stamping.
Dampen the leather with a sponge before carving. Use your swivel knife to outline designs, then stamp textures or patterns with specialized tools and a mallet. Practice on scraps first!
5. Edge finishing makes the difference.
Bevel the edge, wet slightly, and rub vigorously with a burnisher using gum tragacanth, beeswax, or saddle soap. A smooth edge feels pro.
6. Dyeing & sealing.
Use water-based or alcohol dyes in multiple thin layers. Always test first. Seal with acrylic finish or natural oils for a lasting surface.
7. Stitching like a pro.
Use two needles and waxed thread for a classic saddle stitch. Punch holes with a pricking iron or awl – keep spacing even. Don’t rush. Clean stitching makes the piece.
Pro Tip: Share your leatherwork on net-twin.de – from hand-tooled belts to engraved sheaths. Our community values real craftsmanship and detail.
#Leathercraft #ToolingLeather #HandmadeGear #CreativeHands #Craftsmanship #nettwin
Kind regards, Andy
-----------------------------------
Advertising that's really worth it for you!
Get it now: Get a €100 voucher from Temu (new customers only)!
Step 1 - Use my voucher link: https://temu.to/m/uwsjqkbzhhl
Step 2 - Enter the following code in the search field at Temu to secure your €100!
The Code: tar37925Title: Leathercraft for Beginners – How to Work with One of Humanity’s Oldest Materials Leathercraft connects us with millennia of tradition – from ancient armor and saddles to wallets, sheaths, and belts. With just a few tools and some patience, you can shape, stamp, and dye leather into something uniquely yours. Here’s how to get started: 1. Choose the right leather. Start with vegetable-tanned leather – it’s firm, cuts cleanly, and takes tooling and dye beautifully. Thickness is measured in ounces: 4–5 oz is great for wallets, 7–9 oz for sheaths or belts. 2. Basic tools to begin with: - Sharp utility knife or rotary cutter - Swivel knife (for carving) - Edge beveler - Mallet and stamping tools - Burnisher (wood or bone) - Hole punch - Ruler and scratch awl You don’t need a full workshop – just a good workspace and solid lighting. 3. Cutting and patterning. Always trace your pattern on the flesh side with a scratch awl. Cut slowly with firm pressure. Use grid mats for accuracy and safety. 4. Tooling and stamping. Dampen the leather with a sponge before carving. Use your swivel knife to outline designs, then stamp textures or patterns with specialized tools and a mallet. Practice on scraps first! 5. Edge finishing makes the difference. Bevel the edge, wet slightly, and rub vigorously with a burnisher using gum tragacanth, beeswax, or saddle soap. A smooth edge feels pro. 6. Dyeing & sealing. Use water-based or alcohol dyes in multiple thin layers. Always test first. Seal with acrylic finish or natural oils for a lasting surface. 7. Stitching like a pro. Use two needles and waxed thread for a classic saddle stitch. Punch holes with a pricking iron or awl – keep spacing even. Don’t rush. Clean stitching makes the piece. 🎯 Pro Tip: Share your leatherwork on net-twin.de – from hand-tooled belts to engraved sheaths. Our community values real craftsmanship and detail. 📌 #Leathercraft #ToolingLeather #HandmadeGear #CreativeHands #Craftsmanship #nettwin Kind regards, Andy 😆 ----------------------------------- Advertising that's really worth it for you! Get it now: Get a €100 voucher from Temu (new customers only)! Step 1 - Use my voucher link: https://temu.to/m/uwsjqkbzhhl Step 2 - Enter the following code in the search field at Temu to secure your €100! The Code: tar37925 0 Comments 0 Shares 7K Views 0 Reviews
2
0 Comments 0 Shares 7K Views 0 Reviews
2
More Stories
Be Creative
As a completely voluntary provider, we appreciate the support of our community - thank you.

Free For You

Disable Your Browsers Ads Blocker Please.